What follows is simply a step-by-step guide to setting up an ASCOM driver project with Visual Studio 2019 – mainly so that I don’t forget how to do it myself…
Creating from an ASCOM template
- Install ASCOM and developer components.
- Start Visual Studio as admin
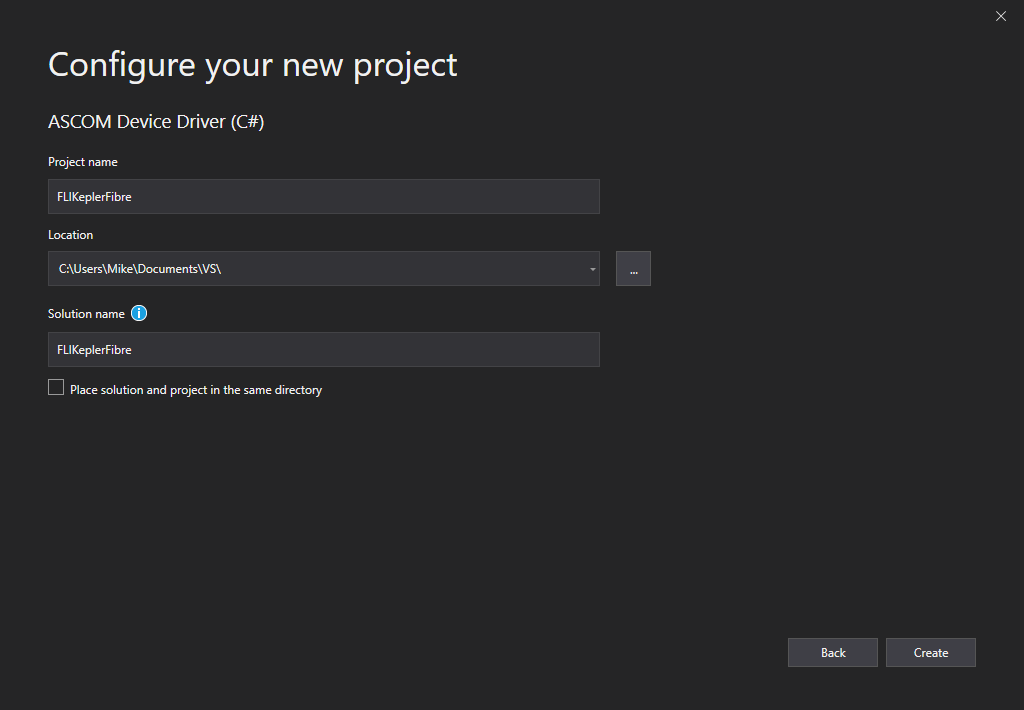
- Click on ‘Create a new project’
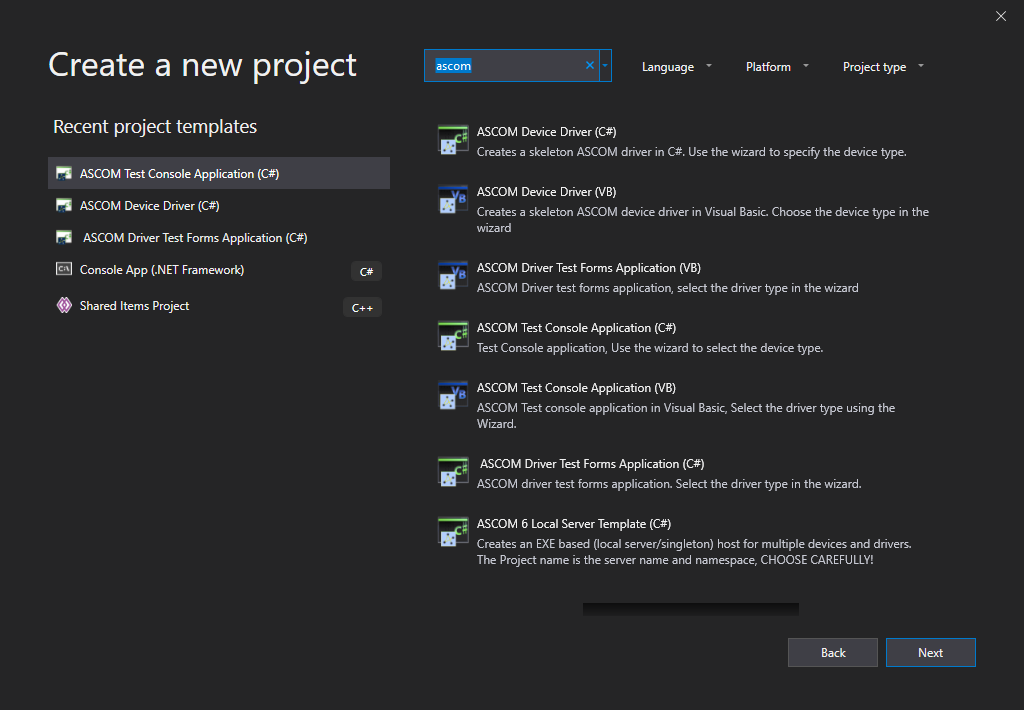
- Search for ‘ascom’ in the search field and choose ‘ASCOM Device Driver (C#)’
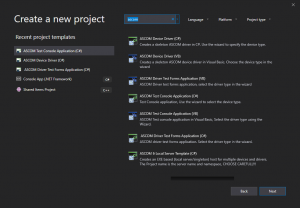
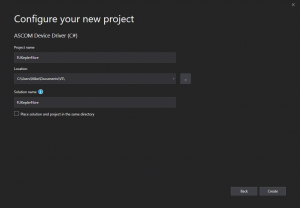
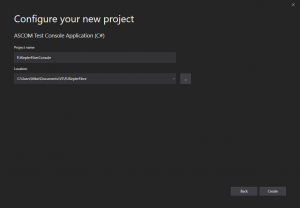
- Give the project a sensical name and Create…
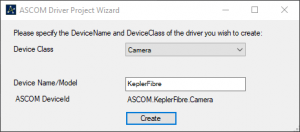
- The ASCOM Driver Project Wizard will then appear. Select a driver class and choose another sensical name. Click ‘Create’.
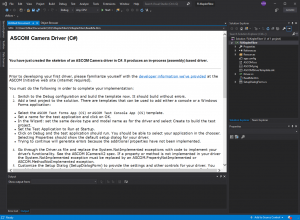
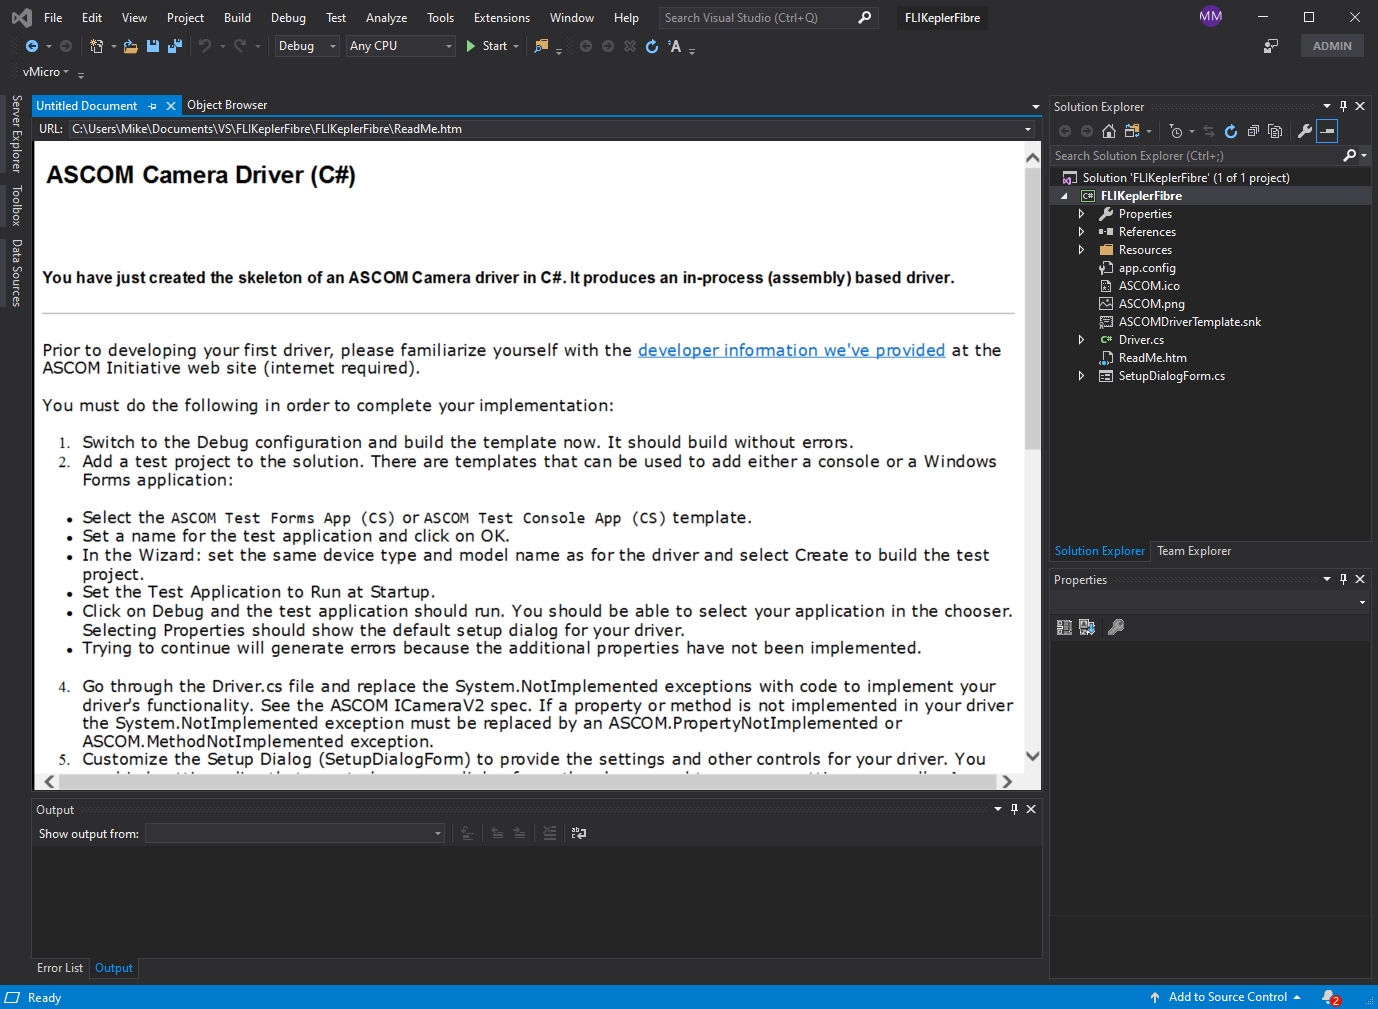
- The Visual Studio solution should appear with a document to be read. Follow the instructions by trying to build the solution and, if successful, adding a new project.
- Add a new project by right-clicking on the solution in Solution Explorer and then Add -> New Project…
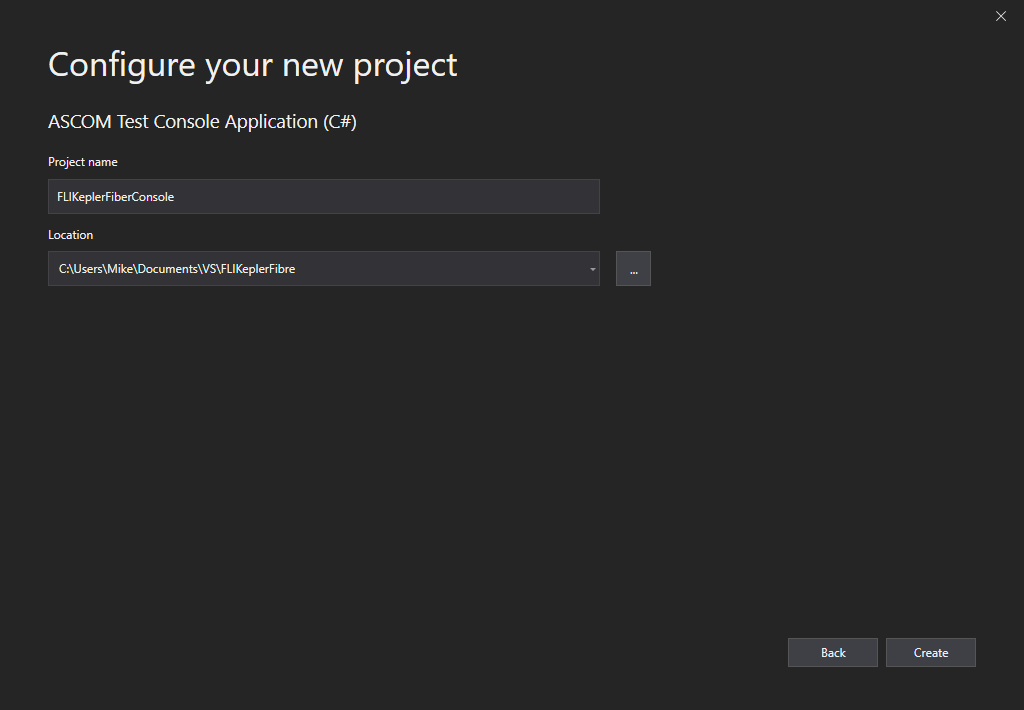
- In the new dialog, choose an ‘ASCOM Test Console Application (C#)’ and click ‘Next’
- Now, choose a name. Maybe just add ‘Console’ to the end of the first project name and click ‘Create’
- The ASCOM Driver Project Wizard appears again. Choose the correct Device Class and use the same Device Name/Model as in the previous project. Click ‘Create’.

- Select the solution in Solution Explorer and then go down to Properties and set the startup project to be the console project.
- CTRL+F5 should start things without debugging. The device chooser will appear. Select the new driver by name.
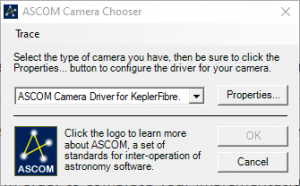
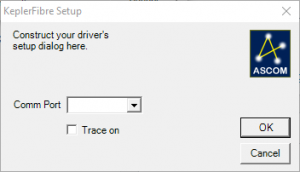
- Select ‘Properties…’ to view the setup dialog.
- That’s about it. A skeleton driver has been created and is ready for customization.


Setting up the ASCOM settings provider
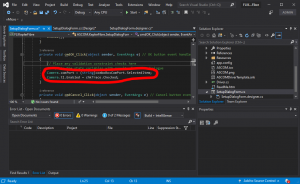
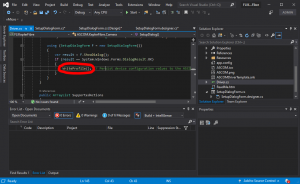
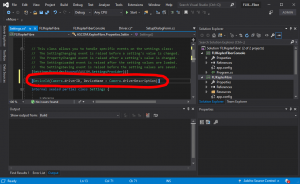
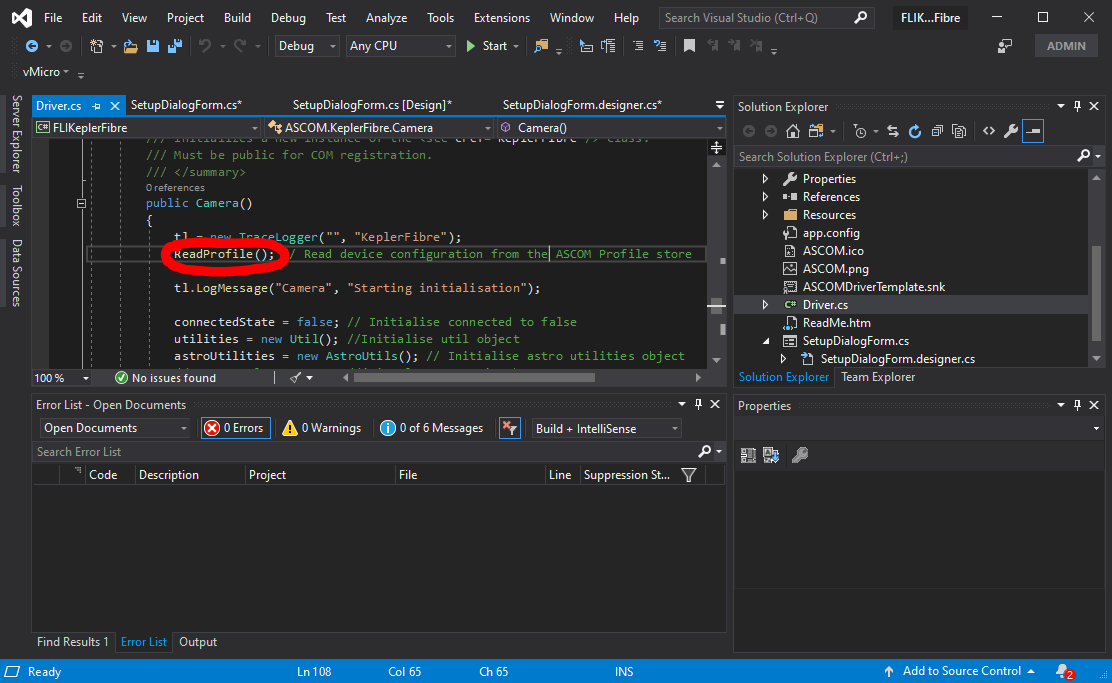
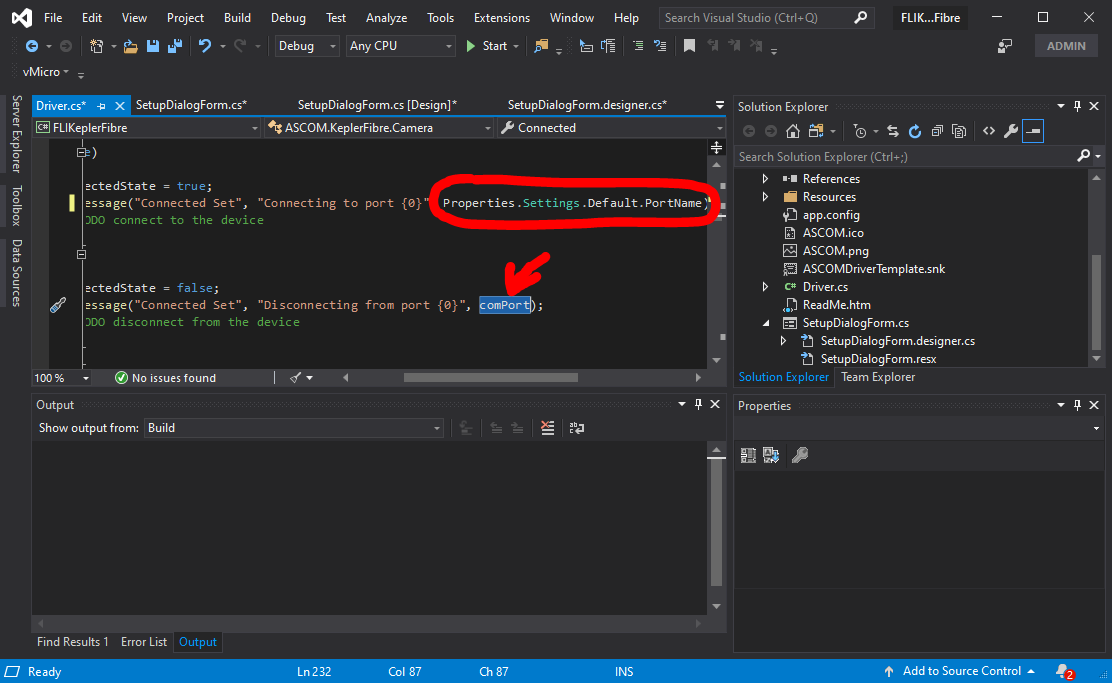
- The first thing to do is to strip out unnecessary code from SetupDialogForm.cs and driver.cs. This will be the code that is attached to elements in the setup dialog. In the default template it is the ‘Comm Port’ selection, the ‘Trace’ check box, and the OK button. Remove the circled code shown below, and add some comments to make sure that you come back and add the appropriate code for reading and writing the settings. Also delete the entire ReadProfile() and WriteProfile() methods.


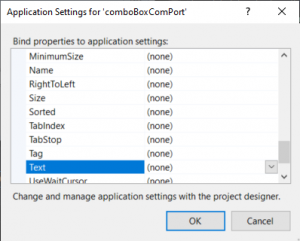
- In the setup dialog select a field such as the default ‘Comm Port’ drop-down box and then click on the PropertyBinding setting in ApplicationSettings

- Click the ellipsis to the right of PropertyBinding and a pop-up should appear
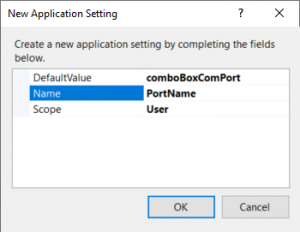
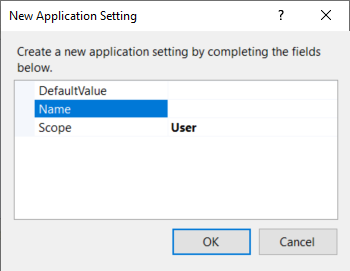
- Click the drop-down menu to the right of text and then click on (New…). Another pop-up window should appear.
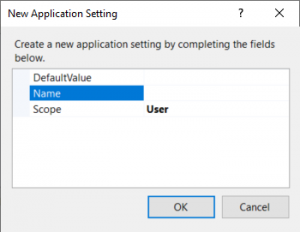
- Give it a name, leave scope as user and click OK. Click OK once more.
- Repeat for all other settings elements in the setup dialog
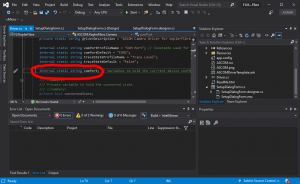
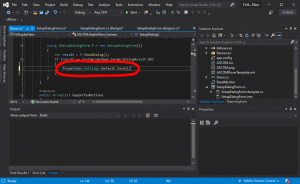
- In driver.cs find the section where WriteProfile was removed and add a line as shown…
- Add a bit more code after this to reload the settings if the cancel button was clicked

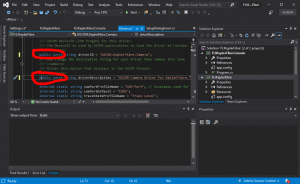
- Anywhere that the old ‘comPort’ variable is used in the code can now be changed to Properties.Settings.Default.PortName

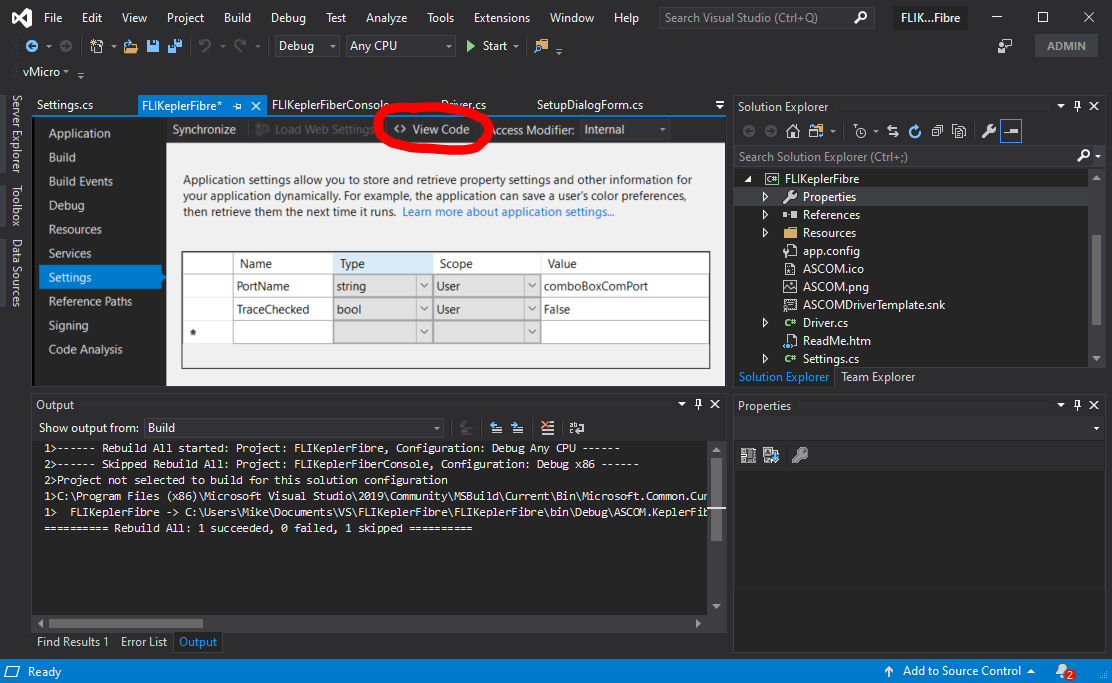
- Double-click on properties for the project
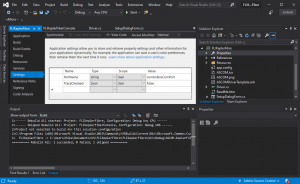
- Click on ‘View Code’ to generate a settings.cs file

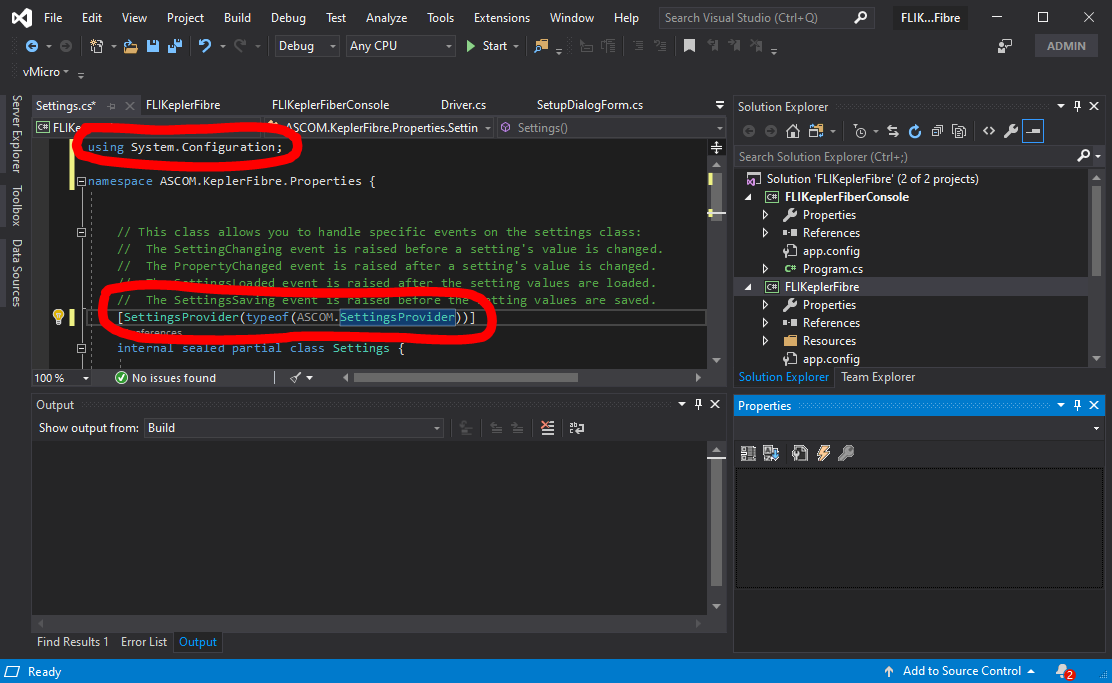
- Add using System.Configuration; to the top of settings.cs if it’s not already there. Add the following settings provider attribute to settings.cs

- Change deviceID and driverDescription definitions to public const in driver.cs
- Add the following to settings.cs
- More to come…


Setting up for FLI cameras
- Import FliUtils project
- Add LibFliProNative.cs and FliPro.cs to driver project
- Add reference in driver project to FliUtils
- Look for errors and add additional references to resolve them